Cricut Design Space - cricut.com/setup

Cricut machine is an electronic cutting machine to cut, score, sew and customize materials. Not an average cutting machine, but it is an advanced innovative technology introduced to operate on figures like wood and fabric.

  • Home
  • Contact Us


Hello, my crazy crafters - I know it's been a while since I posted my last tutorial. But this time, I am going to share with you how to make magnets with Cricut. As I was coming near my kitchen, I realized that my fridge was not looking attractive at all, and it was making my kitchen look dull. That's when I realized that I needed to renovate my fridge and decorate it by sticking funky magnets.

My kids are always keen to learn something new that can enhance their crafting skills. Keeping that in mind, I decided to let them participate with me while creating custom magnets. To make the perfect fridge magnet design, I needed some Cricut tools & Design Space as well.

Don't get anxious, as I have come up with the best way of designing magnets out of a Cricut machine setup. For that, you have to be a little calm and study this blog thoroughly.

Step 1: Create a Magnet Design on Cricut App

In the opening stage of how to make magnets with Cricut, open your Design Space sign-in page and fill in your Cricut ID & password inside the specific blank. Now, press the Upload option and choose your image from the Recently Uploads section. After selecting the image, hit the Add to Canvas option.

Now, choose any shape from the Shapes section and change its size depending on the image size. After doing that, change the background color of the shape and place the image on top of it. Next, change the size of the image and include the text inside the box using the Text toolbar.

Equally important, choose any picture of your choice from your system library or from the Recently Uploads section. After landing on the canvas, insert the shape and click the Slice button. To add the border around the image, go to Offset and add thickness by pressing the Apply option. Follow the same steps and make more magnet designs by changing the color and adding text to the magnet.

After designing all the designs, don't waste any time and take out its printout from your respective printer.

Step 2: Print Out Your Design

Further adding to the how to make magnets with Cricut blog, press the Make It and then click the Continue option. Now, tick the Send to Printer and choose your printing device model from the list. Afterward, cross-check the settings, tick the Print option, and make the necessary changes. Following this, insert your printing sheet into your printer, and after a few minutes, you will get the printout of your magnet designs in front of you.

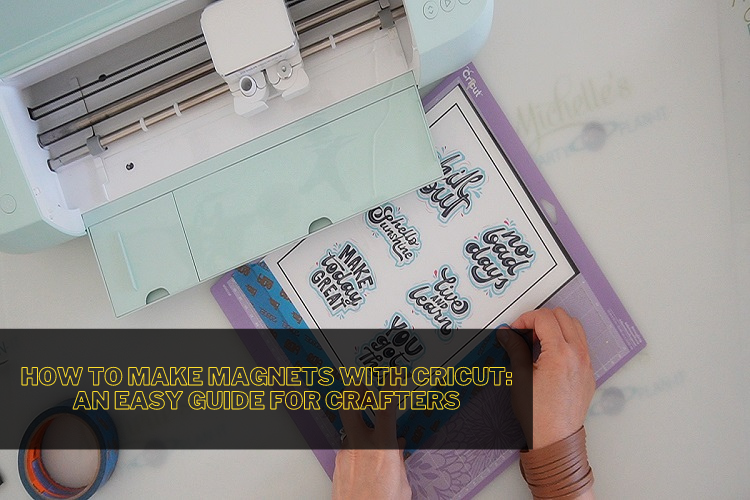
Step 3: Cut the Design With Your Cricut Machine

In addition to designing personalized magnets, go back to the Design Space app, set your material, and then tap the Done option. Furthermore, change the pressure and load tools and materials into your Cricut product. Moreover, you can also make the necessary changes as per your preference before starting the craft machine.

Equally important, stick your printout on the Cricut cutting mat and then load it into the craft machine. With the finalization of the cutting process, unload your mat and start removing the extra material from the mat. However, you can also take the help of your Cricut spatula or weeding tool to remove the material.

Step 4: Stick Your Magnets

Summing up the how to make magnets with Cricut process, gently remove the final designs from the mat. Now, you need to ensure that all the designs are peeled out perfectly without any serious damage. Ensure that you put pressure while placing the customized magnets on your fridge. Apart from sticking this craft on your fridge, you can also give it as a birthday present to your friends or close ones.

Through the earlier-said steps, we've come up to the end of the tutorial of designing personalized magnetic for fridges. Moreover, the crafter can also design another project out of their cutting machine with the help of compatible supplies and proper knowledge about making the project.

Frequently Asked Questions

Can I Make Cricut Magnets Without a Printer?

No, it isn't going to be possible for any DIYer to make any kind of sticker without a printer. With the proper connection of the computer and printer, the user gets the design printout that helps in making the desired craft and gives it a proper formation as per the requirements. 

Can I Make Money by Selling Cricut Magnets?

If you have recently started your own business or are planning to expand one, then selling Cricut magnets is the best option for you. You can design the magnets by using Cricut Design Space app and take out its printout from your printer. Other than that, you need to have a compatible cutting machine and cutting mat that can give you the desired magnet designs for your fridge. 

How Can I Change My Cricut Magnet Design?

It's very simple to change the design of the Cricut magnet during the design process. The user just needs to return back to their canvas and make the necessary changes by changing the font, size, image, or other tools as per their choice. Other than that, they are also given the option of changing the material before starting the cutting process.

For more information visit: Cricut.com/setup login
Cricut maker setup
Install cricut explore air 2

Source: how to make magnets with Cricut


Hey, crafting fam! If you are here to learn how to use Cricut transfer tape? Then, this blog is for you. Transfer tape is the best material for transferring any vinyl Cricut design space app to the desired surface. However, when I bought a Cricut for the first time, I was unaware of the fact that it is really an essential supply when making decals or stickers.

As days passed, I created hundreds of DIY projects using transfer tape, and the result was amazing! I understand that it can be a bit intimidating at first, but you will as you get used to it. You will definitely become a pro crafter.

Despite this, I am here to help you with this simple tutorial that will explain the basic steps of using transfer tape for Cricut projects. Through this blog, I am going to teach you about the importance of using transfer tape. Also, I will make a small project using transfer tape for your better understanding. Let’s start!

Step 1: Create a Design on Design Space

The first step in order to learn how to use Cricut transfer tape is to create a design. Hence, I will show the design that I created for this tutorial. Don’t worry; this is going to be a simple cursive text. No graphics or pictures to make this blog simpler for beginner crafters.

So, here I am adding a text, i.e., “Live Loved.”

Likewise, you can add your own picture or text as per your choice. After that, send the design to your cutting machine and let your Cricut cut it precisely.

Step 2: Weed Out Your Design

When my design was ready, I started weeding it using the weeding tool. I also recommend you use the weeding tool if you don’t want to mess up your design. Let me show you the picture of each step below:

Gently pull the extra vinyl using the weeder, as shown in the picture below.

Here’s your final design after the weeding. After weeding, the next step is to explore how to use Cricut transfer tape to transfer the design.

Step 3: Place the Cut Design on Transfer Tape

Let’s see how to use Cricut vinyl transfer tape. First of all, you have to cut a piece of transfer tape. Make sure you have cut the transfer tape larger than your design. After cutting the tape, you need to peel the backing layer off the tape and place its sticky side on the top of the vinyl design.

But what if your project is too large? Well, in that case, you should start peeling off the backing from the corner of the transfer tape and then place it on the edge of the vinyl. Then peel off the backing as you move ahead and do it until the whole vinyl is covered with your transfer tape.

This way, you can prevent bubble formation, and thus, you will get a desirable result.

You can also use a scraper, which is a Cricut tool that helps to adhere the vinyl sheet to the mat. So, it can also be used to adhere your tape to the vinyl sheet. Instead of using a scrapper, you can also use an old credit or debit card. Once the transfer tape is adhered to the vinyl, you can start peeling off the transfer tape; ensure your vinyl comes along with it.

Step 4: Apply Your Design on the Desired Surface

Now, line up the transfer tape and vinyl wherever you want it on your project. Here, I am going to use it on a pane of glass. I placed it in one corner and then gradually adhered it with the help of a scrapper and credit card.

So, use the same burnishing tool credit card and press the tape and vinyl onto the project. When it is done, finally, you can peel off the transfer tape backing to reveal the final design.

Till now, you might have understood how to use Cricut transfer tape. The easy-to-make simple project can help you practice your project yourself.

FAQs

Do I really need to use Cricut transfer tape?

When you are making a project with heat transfer vinyl (HTV), then, it is essential to use it for better results. Whenever you cut any design with the help of Cricut, the design will be on a backer. Hence, the main objective of using this tape is to transfer the cut design from the back to the desired surface. Thus, you should use the transfer tape whenever you are working with vinyl.

Can I apply my Cricut design to the surface without transfer tape?

Absolutely, yes, and you don’t need to worry about it. This is because you can use painter’s tape. However, transfer tape may cost you, so it’s better to use painter’s tape. Since it is made with crepe paper backing, you can tear it into small pieces, making it a good alternative to transfer tape. Plus, this painter’s tape is a good choice for textured surfaces. In addition, this is not for temporary use, which is why it has a lighter adhesive.

Which transfer tape should I use for Cricut?

The most commonly used transfer tape is Cricut transfer tape. You can use this tape with everyday vinyl uses such as foil vinyl, premium vinyl, and permanent vinyl, but not suitable for heavy-duty such as Glitter vinyl. For heavy-duty vinyl, there is a Cricut Strong Grip Transfer Tape, which is a perfect fit for glitter vinyl.

Final Words

In this blog, I made a simple project to explain how to use Cricut transfer tape. The use of transfer tape is nothing but very simple. No matter if you are a beginner, you can still learn easily with this simple tutorial. However, if you don’t have transfer tape, then you can use painter’s tape, which is equally useful and works perfectly well with all projects. In addition to this, the process will be the same. Now, transform your projects with transfer tape within a minute!

For more information visit: www.cricut.com/setup login
design.cricut.com
cricut design space download
cricut machine setup

Source: How to Use Cricut Transfer Tape

Cricut New Year card

During the New Year, everyone likes to send greeting cards to their loved ones, and I do too. But making it is a difficult task. If you are a Cricut user, then you can easily create your own Cricut New Year card in just a few minutes. Also, I have made a custom card on Cricut Joy. Yes, you heard that right! This mini Cricut Joy is capable of cutting more than 50 materials.

Moreover, I recently finished creating a greeting card; I will now teach you how to make your own card. The process is simple and easy, and a beginner can make it on their own. Be it essential supplies or step-by-step tutorials, I have tried to explain everything in the easiest way possible. So why wait? Let’s dive deeper into it!

What Cricut Supplies Will You Need for Making a Card?

When I started making cards, I collected all the essential accessories, tools, and other items that I needed. Below, I have mentioned the supplies required for making a Cricut New Year card. Have a look at it:

  • Cricut Joy (or Maker & Explore series)
  • Cricut Design Space software installed on the computer
  • Cardstock or Thick paper
  • Cricut Joy Mat
  • Vinyl
  • Cricut Tool Set
  • Cricut Bright Pad (optional)
  • Insert Card

How to Make a Cricut New Year’s Card?

So, ready to start your project on Cricut Joy? Below, I have provided detailed instructions to create a beautiful card, so look no further than the tutorial given below:

Step 1: Upload SVG File or Create Your Own Design

The first step includes uploading a ready-made Cricut design. You can get this SVG from the internet, or you can use Cricut’s free resources to make your own. Other than that, you have the option to create your own design on Design Space.

If you want to upload an SVG file, then you need to follow the steps mentioned below:

  1.  Open the Design Space and go to the Canvas; there, you will find the “Upload” panel.
  2. After that, you have to click the Browse button.
  3. Then, you will be redirected to the folder where you have downloaded your SVG file.
  4. After that, the design will be added to Design Space.
  5. Here, you can edit your design as per your requirements, such as resizing the size of the cards and adding elements.

Step 2: Prepare the Card Mat

In order to make a beautiful Cricut New Year card, you have to load the pre-cut card onto your card mat.

You will find the top layer is sticky and looks like a LightGrip Mat, so you have to fold the top of the card onto itself and you need to press it down.

Tip:Ensure you need to take the time to align the folded card with the pre-printed lines on the card mat. This way, you can make your design perfect!

Step 3: Cut and Weed Out the Design

Once you are ready with your design, you have to press the Go button on the software. After that, your Joy machine will start cutting the design on your loaded cardstock material. After cutting, all you need is to weed the cut design gently and remove the extra materials that are not required. Make sure you are using the right tool to weed your material, such as weeders and tweezers.

Step 4: Assemble Cards

Now we have done our cutting, it’s time to assemble them so that it looks visually appealing. For this, I have chosen this insert card that easily fits into the four cutout corners.

The contrasting paper gives it a much better look than other papers.

Last but not least, if you are thinking why I have added congrats on my greeting card, then it is because I want to congratulate someone. This is no one but my son who scored good marks on his math test. Therefore, I tried something for this New Year.

Besides, you will find a lot of space inside the card where you can wish and express what you want. So, transform the Cricut New Year card into an extraordinary card with a Cricut Joy and spread the Joy of the festive season.

FAQs

Can I make a New Year card with Cricut?

Absolutely! Whether it is a New Year project like a banner, cake topper, or cards, everything is possible with the Cricut machine. Moreover, you can make cards with your Joy, which costs really less, and it will easily fit your budget. Also, if you are in a hurry and don’t want to create those complex designs, then Cricut has a solution for you. You just need to go to the Design Space, where you will find the ready-made designs. You can add them to your canvas and edit them as per requirements.

What machine should I use to make a New Year greeting card?

If you want a cutting-edge result that looks professional and fits your budget, then you need to use the Cricut Explore series. Also, it would be a great choice for you if you want to cut materials like vinyl, iron-on, and paper to make your projects. Otherwise, if you want to go with a more affordable option, then it is your Cricut Joy. It is not only cheap but capable of making your cards with precise cuts.

Is it easy to make last-minute Cricut Joy New Year cards?

It depends on your design; if it is simpler and there are not many elements to be added, then you can make it within a minute; otherwise, it can also take up to 30 minutes. However, Cricut is made to make your task easier, so yes, it is not very difficult to make any cards for the New Year.

Wrapping Up

Finally, I have covered this complete tutorial on how to make a Cricut New Year card. This tutorial is helpful for both beginners and pro-experienced crafters. The tutorial also covers the essential supplies needed to create a personalized Cricut New Year’s card. Despite this, I have explained each step in the easiest way that guides you to make your own card hassle-free. New Year comes once a year, so don’t miss the chance to bring happiness to your loved ones.

For more information visit: Cricut.com setup joy
Cricut login
cricut.com/setup explore air 2

Source: Cricut New Year Card

Cricut Joy app

Cricut Inc. has launched a ton of cutting machines for crafters, but the Cricut Joy is one of my favorite models. This small, compact, and portable tool hit the market in 2020. Don't judge this mini machine, as it can cut 50+ different materials from delicate paper to artboard.

I have been using this Cricut machine for the past 7 months, and there's no way I'm going back from it now. Of course, I am now obsessed with it and love to create countless customized crafts from it. As an expert, I will lead you to the right path to learning all you need to know about this Cricut Joy cutting machine.

What Are the Salient Features of Cricut Joy?

Before including this crafting machine in the craft room, it's evident for me to ensure that you are well aware of this Cricut model. After I will make you across the features, you get to make a clear picture of what precisely the Cricut Joy machine is.Without wasting any more time, let's begin by learning about its features:

  • To begin, this craft plotter is smaller in size and lightweight compared to the Explore and Maker series. Due to this reason, it gets easier to store in a tight place without damaging its corners.
  • Since it is lightweight, it gets easier to carry it anywhere, either while going on a trek or going to someone's home. Now, to keep it safe while traveling, you can keep it inside its tote bag.
  • In addition, this Cricut Joy comes with fewer supplies, making it easier for the DIYer to transform their DIY creative ideas into the real world.
  • Equally important, it supports Smart Materials, which means that you won't need any cutting mat while using this material.
  • On the other hand, this craft plotter has its app, known as the Cricut Joy app, which helps the user connect mobile devices with this machine via Bluetooth feature.

After grabbing this Cricut cutting machine's essential features, it is time to make you learn about how you can use Cricut Joy to create a do-it-yourself project.

Easy Guide: How to Use Cricut Joy?

Further adding to the blog, I am going to make you learn about how to utilize this cutting machine and create a personalized project of your choice. Let's begin the process of how to use the Cricut Joy by going through the below steps:

Step 1: Open the Cricut Joy App and Choose a Design

  1. First, I will turn on my mobile device and open the app. In case you don't have the app, then get it for free from the App Store or Play Store.
  2. After opening the app, I am going to press the Start option given under the Quick Labels section.
  3. Now, press the Start Making button, select the label of your choice, and tap the Next option.
  4. Next, I will change the size of your label and enter the text inside the Enter Text blank.
  5. After making the necessary modifications, tick the Next option given on the top right side of a new page.

Step 2: Load the Material to Your Cricut Joy

  1. Now, I am going to select the compatible materials from the Select Material screen.
  2. Following this, press the Make It button appearing on the right side of your Cricut Joy app.
  3. Afterward, unbox your smart material and gently insert it inside your machine.
  4. Next, connect your craft plotter with your mobile phone via Bluetooth and wait till the wireless connection process is going on.

Step 3: Start the Cutting Process

  1. After the connection process comes to an end, I will insert the pen inside the clamp and Cricut Joy.
  2. Now, turn on the craft plotter, and it will begin to draw the label on the smart material.
  3. Following the completion of drawing the design, I will remove the pen and again insert the blade in the same clamp.
  4. Next, I will press the Go button on the app to proceed toward the final step.
  5. After the drawing and cutting process will come to an end, I am going to unload the mat slowly.

Step 4: Peel Off Your Design

  1. After unloading the mat from the craft plotter, I will cut the extra mat using a Cricut scissor and save it for future projects.
  2. Now, I will peel off the final design from the cutting mat and place it in the center of your jar in a proper alignment.
  3. Lastly, I am going to use a scraper tool to get rid of any bubbles or wrinkles on the label.

Summing up this post, as an expert, it was my responsibility to introduce you to the Cricut Joy machine as well as its features and how it works. By considering the above-said details, it will likely get more straightforward for you to access this cutting machine and create different personalized projects within minutes.

Final Words

Through this blog, I covered most of the things that helped learn more about this craft plotter. This ultra-compact smart cutting machine can make fun and functional projects within 15 minutes or less. Besides, the Cricut Joy is compatible with all materials as well as Smart Materials. Some of the famous DIYers love to make various projects out of this craft plotter.

For more information visit: cricut.com/setup joy
cricut maker setup
download cricut design space

Source: Cricut Joy app

Cricut Joy Cyber Monday

Are you looking for the best Cricut Joy Cyber Monday deals? Well, I have a secret that will save you $125.30 on Cricut Joy. Want to know how? You will get your answer in this blog. Through this blog, I will share the top 3 deals on Cricut Joy, Cricut Joy Xtra, and its bundles.

Being a passionate crafter, my role was to create attractive and unique crafts that would sell well. I am selling my Cricut products on various online e-commerce platforms. But, my successful career is nothing without these Cricut cutting machines.

Plus, I have been using these tools for more than 3 years, and my expertise allows me to guide you to the best deals you can get on Cricut Joy. I often buy expensive devices for special occasions, such as Black Friday and Cricut Cyber Monday deals. As a result, I get good discounts on products. Let’s delve into this blog to find out the best deals for Cricut Joy.

Deal 1: Cricut Joy

A Cricut Joy machine with its box available in the Cricut Joy Cyber Mondaysale.

Amazon is going on Cricut Joy Cyber Monday sales in which the price is expected to reduce from $179 to $125.30. But, if you want to buy this machine from Cricut’s official website Cricut.com setup, then you can get this at $129.99.

I understand this machine is not capable of massive production, but it is suitable for those who want portable devices. You will love to use this machine as it is portable, and you can cut small pieces while you are on the move.

Above all, you can organize and personalize almost anything using your Cricut Joy. Now, you can make happiness in just a few seconds. Whether it is personalized decals or pro-looking labels, Cricut Joy can handle all of them easily.

Deal 2: Cricut Joy + Smart Iron-On Bundle

A Cricut Joy with several smart iron-on materials in different colors.

The Cricut Joy + Smart Iron-On bundle is available at $169. Initially, it was available for $205. With these bundles, you will come with Smart Iron-On materials in different colors. However, when you buy this set, the machine also comes with various accessories and toolsets. For instance, blade + housing, fine point pen, standard grip mat, power adapter, and other ready-to-make projects. In addition to ready-to-make projects, you can access them on Cricut Design Space after registering your products online.

Besides these, I prefer to buy machines along with bundles because we get everything at affordable prices. Otherwise, we will need to buy them separately, which does not make sense to me. Hence, purchase the Cricut Joy + Smart Iron-On bundle in Cricut Joy Cyber Monday deals, as you will save up to $69.

Deal 3: Cricut Joy Xtra + Bundle

A Cricut Joy Xtra machine with everything bundle, including transfer tape, Smart Vinyl, Smart Iron-On materials, and different wedding toolsets.

Cricut Joy Xtra is the newest version of Cricut Joy, which was released this year. This year, I am also planning to buy this advanced cutting machine, which comes with extra features. Users can use this device to make T-shirts, labels, stickers, and so much more.

Currently, the Joy Xtra is available at $199 in Cricut Joy Cyber Monday deals. However, prices may drop during the Cyber Monday sale. But, if you want to buy machines along with the Everything bundle, you can avail of them at $219.

Final Thoughts

I will give you only one piece of advice: wait for Cyber Monday. On this particular day, many brands, including Cricut, will go on big sales. During this sale, you can buy various items such as Cricut cutting machines, heat press devices, and other materials or bundles. In short, I have added 3 deals on Cricut Joy, the newest Xtra model, and its bundles. All these products are going on sale, and you may see some reduction in the price on Cricut Joy Cyber Monday sales.

FAQs

Should I wait until Cyber Monday to buy a Cricut Joy?

Yes, you can wait if you want the best offer on each deal. The Cricut and many other retailers go on mega sales on these special occasions. This day is specially dedicated to online shopping. You should wait for this day and then purchase Cricut machines at the most affordable prices.

When does Cricut do the Cyber Monday sale?

This year, Cyber Monday is on the 27th of November. On this day, Cricut will go on a mega-deal that will include Cricut machines, supplies, accessories, and digital products. This is the day when you can save a good amount of money on every order. There is even a possibility of 50% off on Cricut materials and accessories. Therefore, Cyber Monday is the best time to shop for anything at decent discounts.

Is a Cricut Joy Xtra coming out this Cyber Monday sale?

Yes, currently, it is available at $199 on the Cricut site. Since the Xtra model was launched this year on September 7, 2023, the chances are high that Cricut and other retailers will offer a genuine offer on the Cyber Monday sale. Above all, Cricut offers the best value on Cricut machines along with bundles.

For more information visit: cricut design space download
cricut machine set up
design.cricut.com
cricut.com/setup maker 3

Source: Cricut Joy Cyber Monday

The Cricut Explore Air 2 is the newest dye-cut machine in the Explorer series. It is the latest fabric-cutting material that cuts and designs unlimited materials for every crafter. This Explorer machine can create different patterns or crafts, giving the ‘I Did It’ vibes to the designer.

This automatic dye-cut machine will make it possible for every crafter to make their unimaginable ideas come true in their desired form. Inside this manual, you be learning in-depth about the Cricut Explore Air 2, its features, differences, setup process, etc.

How to Define Cricut Explore Air 2?

For all those, who are searching for the Cricut Explore Air 2, then this section is perfect for you. The following paragraph will help you in collecting all kinds of important details related to this member of the Explore series.

This DIY project-preparing machine is preferred for creating customized projects. It adds a positive look to the projects, rooms, and schools. This machine can be accessed by users who are 16 years or above with legal identification.

What are Explore Air 2 Characteristics?

Before buying the material cut-dye machine, it’s important for the users to get familiar with the basic characteristics of this machine. The following points will assist you in learning about this model of Explore machine:

  • It has the ability to cut more than 100 types of fabrics with its sharp and swift blades.
  • The machine work with six types of tools cut, write, score, foil, etc.
  • You can use the Design Space app for free while accessing the machine.
  • This Explore series model has an accessory and tool holder that can be reached easily.

We hope that these features will help you in choosing the correct Explore Air 2 to complete your project. However, you will be coming across the details about how to set up the machine to use it.

How to Setup Cricut Explore Air 2?

Cricut Explorer 2 setup process for Windows/Mac & iOS/Android differ from each other. You just need to observe the steps present below:

Windows/Mac

If you want to set up the machine with your PC, go through the mentioned below stages:

  • You need to plug in the machine inside the switchboard.
  • Click on the power button.
  • Clip your respective machine via USB cable or Bluetooth.
  • Then, visit the official website.
  • Download & install the Design Space software.
  • To complete the setup process, you need to follow the instructions.
  • Now, sign-up for the Cricut app and set up your machine.
  • Once the setup process will get complete, you’ll be ready to do the testing process.

iOS/Android

In case you’ve got a Mobile and want to operate the Explore version through it, you are guided to thoroughly complete the process via the following steps:

  • You need to open the machine and plug it in.
  • Click on the ‘Bluetooth’ icon.
  • After opening the Bluetooth, pair it with the machine.
  • Now, you need to complete the Design Space download & install process.
  • After launching the app, sign in to the account and create your ID.
  • At the menu section, press the ‘Setup’ box.
  • Follow the setup instructions shared on the screen to complete the process.
  • Lastly, you can do the testing of the machine.

After setting up the machine, you can also pair up your respective device Android/iOS device to get the preferred project. Just go through the steps explained in the following section:

How to Pair Bluetooth with Maker 2 Model?

If you don't want to transfer your files to the machine via a USB cable, the option of pairing up with Bluetooth is also available. Below we’ve shared the individual steps that will help you in learning about the Bluetooth pairing process with the machine cut-dye machine:

Windows

  • Make sure that your material-cutting machine is switched on.
  • Open the ‘Device Manager’ and tick on ‘Settings.’
  • At the settings page, click the option with ‘Devices.’
  • Slide the Bluetooth to activate it.
  • To add new devices, tap on ‘Add New Device.’
  • Click the ‘Add a device’ and submit your PIN.
  • Press on the ‘Connect’ button.
  • Your machine is paired with your machine.

Mac

  • Tick on the ‘Bluetooth’ icon.
  • Click on your machine name to pair up your machine.
  • Once your pairing process ends, the pop-up window will appear.
  • Now, you will be notified about the successful pairing.

iOS/Android

  • Tick on the ‘Settings’ box.
  • Now, select the ‘Bluetooth’ option.
  • Open Bluetooth and choose your machine name.
  • Enter the PIN code and press the ‘Ok’ option.
  • Your pairing will come to an end.

Cricut Explore Air 2: Conclusion

It has been hoped that this blog has given a complete Cricut Explore Air 2 overview, its features, etc. If you’ve any doubts/questions about the machine, then refer to the FAQs shared below.

FAQs

Question: How much time does it take to set up Cricut Explore Air 2?

Answer: It takes around five minutes-10 minutes to set up the Explore 2 machine on PC & Mobile system.

Question: Which app should you use for Explore Air 2 projects?

Answer: Design Space is required to design or create the project on the digitalized canvas.

Question: Can I use Explore Air 2 to transfer the images via mobile phone?

Answer: Yes, you can easily transfer the images via mobile phone without an internet connection through Bluetooth.

Visit: cricut.com setup mac

design.cricut.com/setup

cricut.com/create

cricut setup download

cricut maker setup

SOURCE: How to Setup Cricut Explore Air 2


Cricut machines require various additional tools and supplies to complete DIY projects for you. Among various tools, the Cricut mat is one of the most used ones. There are various cutting machines that are compatible with mats. These mats ensure that you cut your designs with utmost precision. However, with regular use Cricut mat can get dirty. Hence, this write-up will show you all the essential knowledge on how to clean my Cricut mat.

What Supplies Can You Use to Clean the Cricut Mat?

Before you start to clean the Cricut mat, you first learn about what you can use to do that. Here are some supplies you can use for cleaning your mat.

  1. Dish Soap
  2. Lint Roller
  3. Dish Brush
  4. Bleach-free baby wipes, and others.

How to Clean My Cricut Mat?

As we know that the Cricut cutting mat is sticky, but they will not remain the same always. And the Cricut mat starts to wear out after 50 uses. So, if you want to keep your mat useful for a long period, then it is necessary to know the cleaning methods. Once you have got everything you require to clean the mat, then you can have to start the cleaning process. Here is how you do that for light debris on the mat.

With Baby Wipes

Here is the right process to clean the Cricut mat using baby wipes without causing any issues to the mat.

  1.  First, you have to take alcohol and bleach-free baby wipes and gently make a circular motion on the mat.
  2. After that, you need to be careful with the pressure you are applying and not rub off the adhesive.
  3. And then, leave the mat for some time to air dry. (Do not use any type of dryer to dry the mat; It can permanently damage your Cricut mat. You should also avoid any cloth to dry it.)

With Lint Roller

Link Roller is one of the best tools to clean the light dust from your Cricut cutting mat. With the help of the Lint Roller, you can clear scarp after the cut, dust, glitter, silver, and others. Also, the best thing is Lint Roller is one of the safest methods to clean the Cricut cutting mats.

With Dish Wash Soap

Dishwash soap is another great option if you want to clear the heavy dirt and debris from the mat. You can use the soap with running lukewarm water. The steps to clear the mat with soap are as follows:

  1. First, clear the dust and debris from the mat using a plastic card or plastic scrapper tool.
  2. Next, you are required to keep the mat on a flat surface and make sure that the water cannot pass through. You can use a kitchen counter or a plastic table.
  3. Then, take the mat and then scrub the mat’s surface gently in a circular motion using a microfiber cloth and dish brush.
  4. After washing the mat, you must put it in lukewarm water.
  5. And then, you have to leave it to dry.
  6. Before you start using the mat again, ensure that it is completely dry.

What are Some Effective Ways to Keep Your Mat Clean?

Frequently cleaning your mat is not always good when you can keep your mat clean for a long period of time. Below are some of the methods that help you keep the Cricut mat clean:

  1. Try all the methods of cleaning the mat and stick to the one that is most effective.
  2. The Cricut mat usually comes with plastic cover sheets to protect your devices. So, you should always keep your mat covered.
  3. Only use the mat when it is necessary to use it. Some Cricut machines can work without the mat.

Frequently Asked Questions (FAQs)

Can you use alcohol wipes to clean the Cricut mat?

Yes, you can use the alcohol wipes to clean the Cricut mats. Taking the alcohol wipes can remove the dirt or dust without giving much pressure. If you put too much pressure while cleaning the mat, chances are you will remove the adhesive part from the mat.

How do you clean a Cricut mat without losing the stickiness?

Here are the steps to clean your Cricut mat without losing its stickiness.

  1. First, you need to place your mat on a flat surface.
  2. And then take it to the sink.
  3. After that, run the tap of lukewarm water on the mat.
  4. You can use a brush to remove the debris from the mat's surface.
  5. Use the brush gently; otherwise, it can damage the mat.
  6. Take a towel and pat the mat carefully.
  7. Next, leave the mat to air dry, and then you can use it.

How long does a Cricut mat last?

There are any not specific periods for the life of the Cricut mats. However, they can last for up to around 50 uses. Also, if you are cleaning the mats regularly, then you can use them for more time.

How do you revive a cutting mat?

First, you must remove all the excess dirt from your mat. Next, moisturize the mat to restore its surface. You can use dish soap or vinegar to clean the cutting mat. Plus, using these products can remove any time of stain.

Visit: cricut.com setup mac

cricut maker setup

cricut design space download

cricut machine set up

cricut.com/create

SOURCE: How to Clean My Cricut Mat

Newer Posts Older Posts Home

SUBSCRIBE & FOLLOW

POPULAR POSTS

  • Which Is The Best Cricut Heat Press Machine In 2022?
  • What's The Difference Between Cricut Maker And Cricut Maker 3?
  • How to Connect Cricut to Phone: A Guide for Beginners
  • Cricut Explore Air 2: An Ultimate Craft Cutting Machine
  • Amazing Black Friday (2022) Deals Live On Digital Gadgets
  • Cricut Explore Air 2 Download: A Full Guide for Mac/Windows
  • Cricut Joy Review: Best Crafting Machine For Beginners
  • Top 6 Iron On Vinyl Cricut Projects [How to Make Them]
  • How To Make Cricut Wedding Invitations Cards? [Full Guide]
  • What is Cricut BrightPad and Its Uses?

Categories

  • connect cricut to phone 1
  • cricut 7
  • Cricut App 3
  • Cricut Blade 1
  • Cricut BrightPad 3
  • cricut com setup 32
  • cricut com setup joy 2
  • cricut com setup mac 24
  • Cricut computer setup 1
  • Cricut Design Space 64
  • cricut design space app 5
  • cricut design space download 8
  • cricut design space software 1
  • Cricut EasyPress 2 3
  • Cricut EasyPress 3 2
  • Cricut Explore 3
  • Cricut Explore 2 3
  • Cricut explore air 2 10
  • cricut explore air 2 setup 1
  • cricut explore air 2 software 1
  • Cricut Explore Air 3 1
  • Cricut Heat Press 2
  • Cricut Joy 1
  • Cricut Joy app 2
  • Cricut Joy Cyber Monday 1
  • Cricut Joy Machine 12
  • cricut joy tools 1
  • Cricut Joy Xtra 2
  • cricut login 3
  • cricut machine 33
  • cricut machine setup 9
  • Cricut Machines 4
  • Cricut Maker 5
  • cricut maker 3 36
  • cricut maker 3 setup 8
  • cricut maker setup 19
  • Cricut Mat 1
  • Cricut mats 3
  • Cricut Mini Setup 8
  • Cricut New Year card 1
  • cricut setup 39
  • cricut setup download 1
  • cricut setup for mac 14
  • cricut setup for pc 26
  • Cricut setup on computer 3
  • Cricut Shirt Ideas 1
  • cricut software app 2
  • Cricut t-shirt ideas 1
  • Cricut Transfer Tape 2
  • Cricut Window Setup 23
  • cricut won't connect to computer 1
  • cricut.com setup mac 2
  • cricut.com/create 12
  • cricut.com/register 8
  • cricut.com/setup 58
  • cricut.com/setup app 1
  • cricut.com/setup joy 4
  • cricut.com/setup windows 13
  • cricutcomsetup 1
  • design.cricut.com 7
  • design.cricut.com setup 8
  • design.cricut.com/setup 5
  • how to install Cricut Design Space 1
  • how to make shirts with cricut 1
  • setup cricut maker 3 6
  • Silhouette Cameo 4 1
  • Smartphones 1
  • www.cricut.com setup 9
  • www.cricut.com/setup 19

Search This Blog

Powered by Blogger
  • October 20241
  • July 20241
  • May 20242
  • April 20242
  • March 20241
  • February 20243
  • January 20242
  • December 20232
  • November 20231
  • April 20234
  • March 20238
  • February 20238
  • January 20235
  • December 20227
  • November 202210
  • October 20228
  • September 20228
  • August 20224
  • March 20221

Report Abuse

About Me

My photo
Richie Remington
View my complete profile

Trending Articles

  • Which Is The Best Cricut Heat Press Machine In 2022?
  • What's The Difference Between Cricut Maker And Cricut Maker 3?
  • How to Connect Cricut to Phone: A Guide for Beginners
  • Cricut Explore Air 2: An Ultimate Craft Cutting Machine

Popular Posts

  • Which Is The Best Cricut Heat Press Machine In 2022?
  • What's The Difference Between Cricut Maker And Cricut Maker 3?
  • How To Change Cricut Blade? [Learn Here]

Labels

  • Cricut Design Space
  • Cricut Joy Machine
  • Cricut Machines
  • Cricut Window Setup
  • cricut
  • cricut com setup
  • cricut machine
  • cricut setup
  • cricut.com/setup
  • cricut.com/setup windows
  • cricutcomsetup
  • www.cricut.com setup

Distributed By Gooyaabi | Designed by OddThemes