Cricut Design Space - cricut.com/setup

Cricut machine is an electronic cutting machine to cut, score, sew and customize materials. Not an average cutting machine, but it is an advanced innovative technology introduced to operate on figures like wood and fabric.

  • Home
  • Contact Us


What is the Print-Then-Cut feature on a Cricut Machine?

The print-Then-Cut feature in the Design Space allows you to print your design out of your home printer, and after printing, it cuts your design. You just need to put your design on the adhesive mat and insert it into the machine. The sticker will be automatically cut as per your design in the Design Space.

The Print-Then-Cut feature works on a cut sensor which makes a rectangle outline around your printed image. On sensing the image, the Cricut machine then cuts your image.

Read More...www.cricut.com/setup , cricut com setup mac

Necessary Things You Require To Make Cricut Stickers

Here are the following you will require to make stickers in the Cricut machine:

  • Cricut Machine: You need a Cricut machine that can perform the Print-Then-Cut task in the Design Space.
  • InkJet Printer: If you want to perform Print-Then-Cut, you need an InkJet printer to print your sticker. You can use any high-quality InkJet printer to maintain image quality.
  • Vinyl Sheet or Printable Sticker Paper: You can use any printable sheet paper or vinyl sheet of your choice. You can choose from our recommended list in this blog.

Cricut Machines For Print-Then -Cut

You can perform the Print-Then-Cut operation in many Cricut machines like the Cricut Explore Air 2, Explore 3, Maker, and Maker 3. You cannot perform the Print-Then-Cut feature on the Cricut Joy machine.

Step By Step Process on How To Make Cricut Stickers In The Design Space  

Step 1: Create/Make Your Image File

You can design your sticker using apps like Procreate, Illustrator, or Design Space, which is a free software by Cricut.

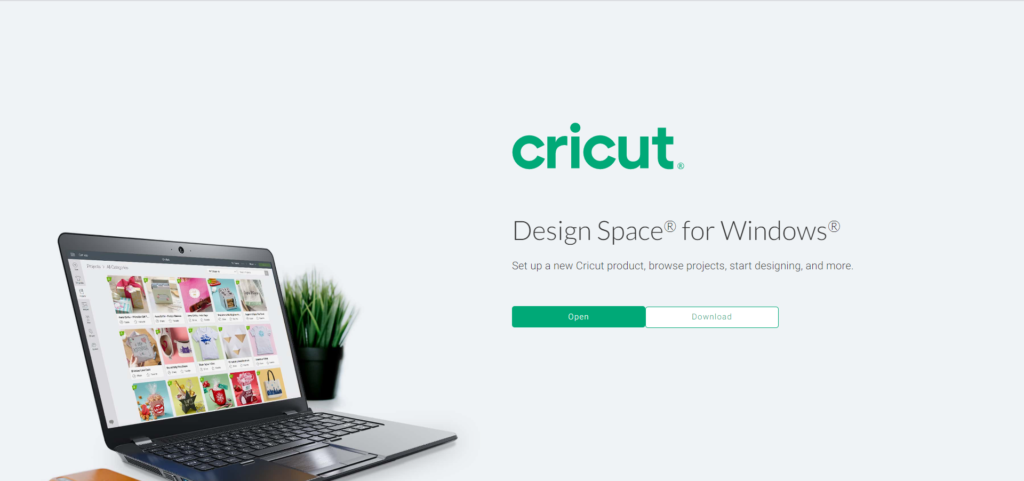
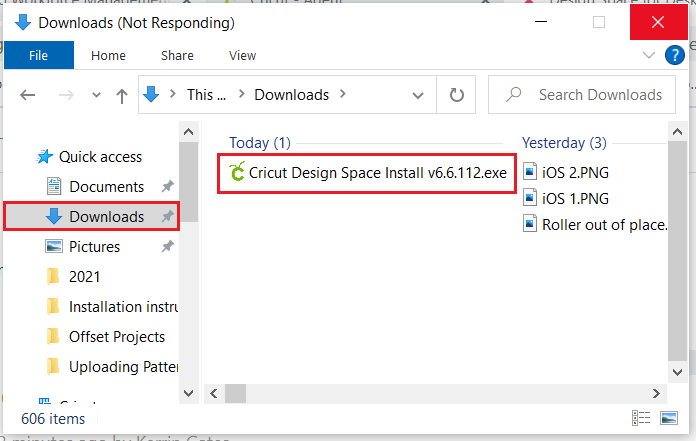
Step 2: Upload You Sticker On The Cricut Design Space

  • To upload the sticker you made, open the Cricut Design Space app on your PC or mobile.
  • Now click on the New Project.
  • After clicking on New Project, upload your image, and select the image from the specified location you saved your image.
  • Now select your image type from the Design Space. You can select the desired image type, like the Complex image type.
  • Then a new dialog box will appear; click on the “Save As Print Then Cut Image”option and name the image by your choice.
  • After naming your image, click on the save button.
  • Now click on the add image to add your image from your desired location into the canvas.

Step 3: Print Your Image From Your Home Printer

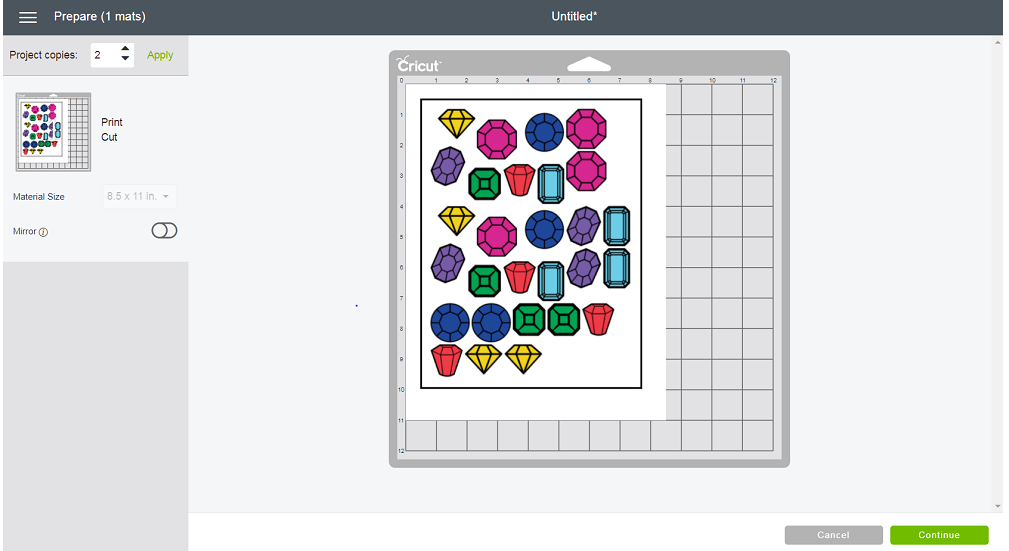
  • Make sure that your image fits and is compatible with the Design Space canvas. And make sure that your image does not exist in the maximum printable area of the sheet (6.75/9.25).
  • Now add the sticker paper or vinyl sheet into your printer where you want to print.
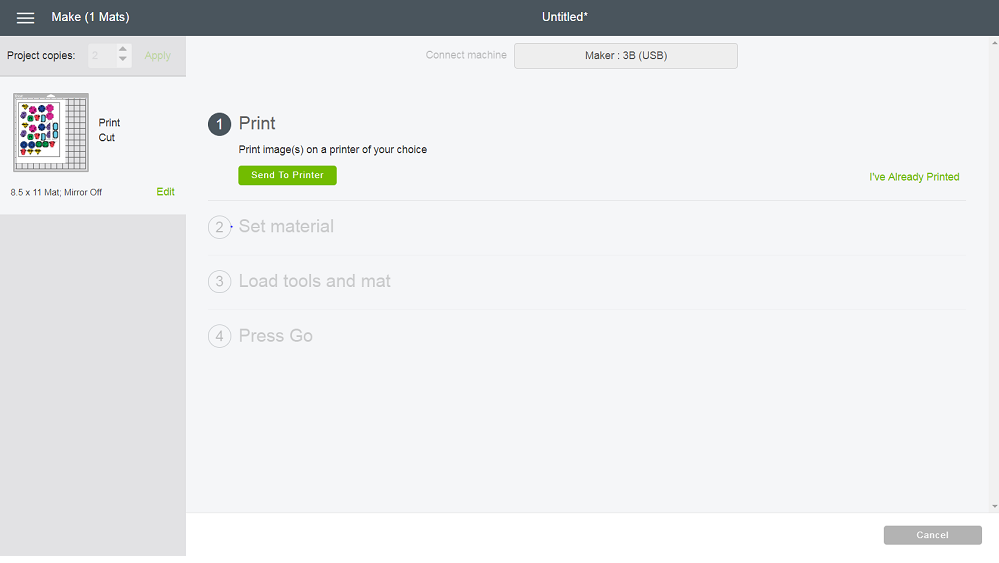
  • After inserting the paper, click on the “Make It” button to start the printing process.
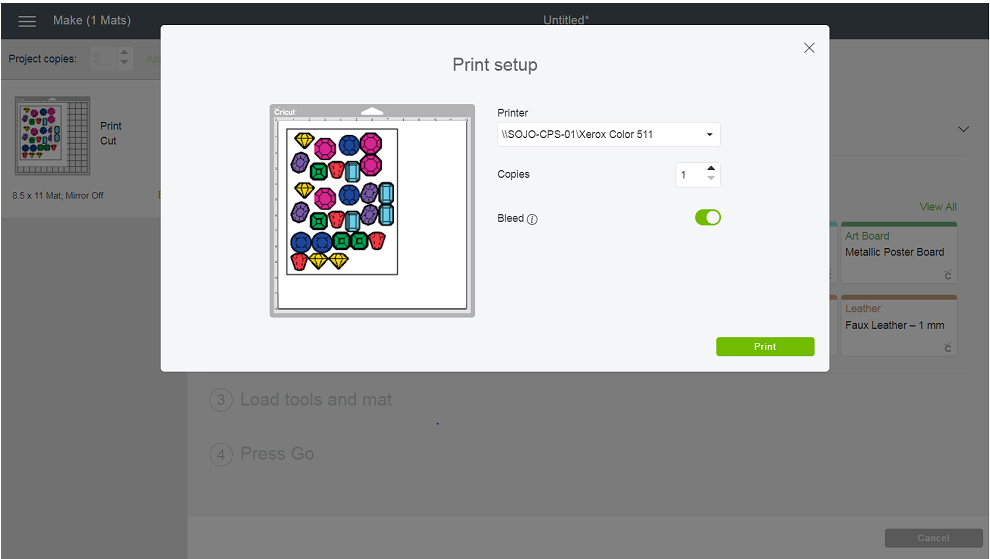
  • A new dialog box will appear; fill in your print quality settings.
  • Once you have printed, cross-check whether the image boundary is outlined with black lines.

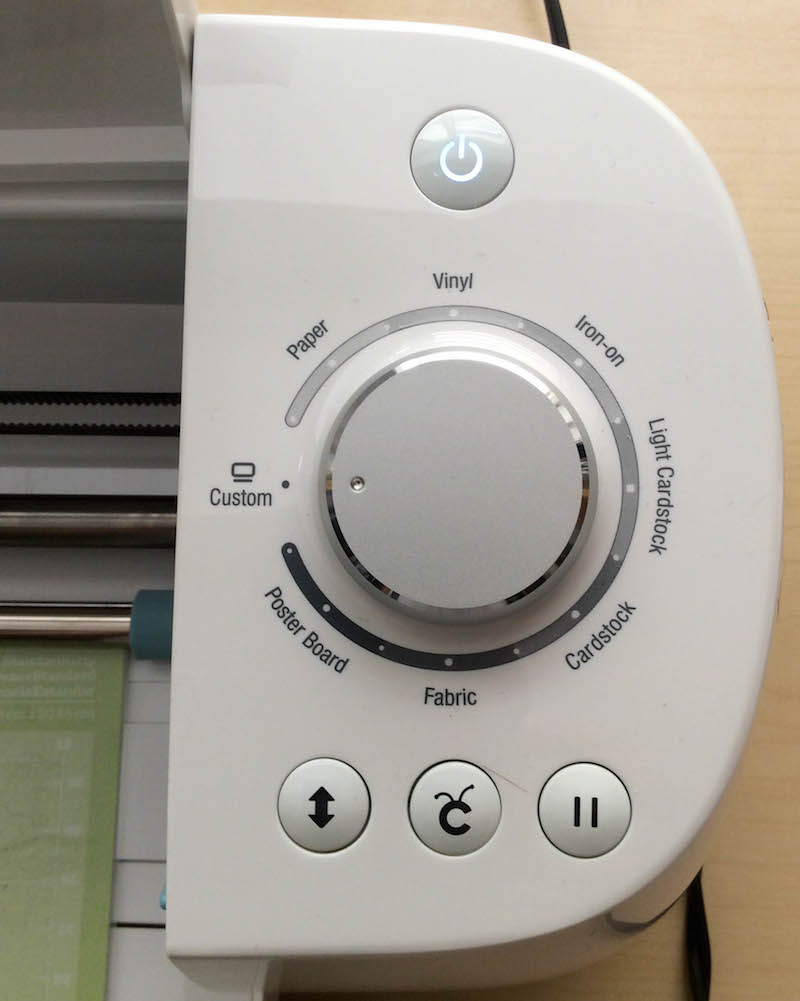
Step 4: Set Your Material On The Adhesive Mat

Load your material inside your Cricut machine and set your cutting setting to either Kiss Cut or Die Cut.

Step 5: Load Your Mat And Cut Your Sticker

Make sure to set your printed paper perfectly on the Cricut mat. Attach your sheet and mat perfectly with each other to insert them into the Cricut machine.

Step 6: Cut Your Sticker

After your mat and printing paper are perfectly fitted in the Cricut machine, go to the “Cut” command to start the cutting process.

Step 7: Upload Your Cricut Mat And Cut The Sticker

After your cutting process is finished, unload your mat and remove your stickers from the mat. Turn your Cricut login mat upside down and peel your sticker from the sheet. Your stickers are ready!

How Are The Best Cricut Papers For Making Stickers

For making good quality stickers, you can go for matte white or full printable sheet paper, which are specially made for making stickers for InkJet printers.

Best Online Websites For Cricut Stickers Images   

There are many websites available online, like Creative Market, Etsy, Creative Fabrica, and many more you can use to download the image of your choice.

Best Machine To Make High-Quality Cricut Stickers

Cricut Explore Air 3 and the Cricut Maker 3 are both great at producing high-quality stickers, and both machines come with a Print-Then-Cut feature.

Conclusion

In this blog post, we tried to cover every single detail about the Cricut Stickers. We have also included the step-by-step process on how to make stickers with your Cricut. You can follow the same process with your Cricut machine. Make sure your Cricut machine has a Print-Then Cut feature.

Frequently Asked Questions

Can I make stickers with Cricut?

The Cricut Maker and Cricut Explore Air machines are great for making stickers. Both machines are equipped with the “Print Then Cut feature.”

What things are required to make Cricut stickers?

Below is the list of things you need to make stickers with your Cricut machine:

  • Cricut machine
  • Access to the Design Space software
  • Sticker Paper
  • Any InkJet printer
  • Cricut Mat

Do Cricut print stickers or just cut them?

Print-then-cut is an awesome feature that lets you print your designs from your home printer. And then, after printing, you can put your printed design on the cricut adhesive mat to start the cutting process. This feature helps you make stickers, decals, and other things.

Are the Cricut Machines worth making Stickers?

The Cricut machines are definitely worth making stickers as the design space is super easy to use. And because of its print-then-cut command, the process is really easy.

Is a printer required with a Cricut machine?

Yes, you need an InkJet printer with a Cricut machine to perform the print-then-cut features in the Design Space

SOURCE: How To Make Cricut Stickers?


Cricut login is an amazing electronic cutting machine that easily cuts materials in one click. It can easily cut the materials such as vinyl, card stock, balsa wood, paper, leather, etc., and makes them awesome crafts, greeting cards, stickers, labels, etc. The most interesting thing is that the in-built blades make wonderful shapes and designs. This machine is ideal for professionals and also for beginners. To do awesome projects, you must install them properly by following the instructions from the www.cricut.com/setup page.

Social Links:

https://about.me/richieremington
https://richieremington7.tumblr.com
https://cricutjoymachine.blogspot.com
https://cricutcomsetupdesign.wordpress.com
https://www.pinterest.com/richieremington7
https://richieremington7.medium.com
https://cricutsetupforpc.quora.com
https://cricutdesignspace.odoo.com
http://cricutsetupblog.epizy.com
https://cricutsetupforpc.godaddysites.com
https://vimeo.com/user166777301
https://www.behance.net/cricutsetup12
https://linktr.ee/cricutdesignspace
https://www.youtube.com/channel/UCYXYYFE-hehBPHSR0-OwlyQ
https://www.facebook.com/Cricut-Design-Mart-101731592616635
https://www.deviantart.com/richieremington7


Making invitations are costly, and people spend thousands of dollars making them. Now you save that money and make invitations by yourself. Don’t worry; making them will be super easy because, in this blog, we will give a detailed step-by-step procedure on how to make Cricut wedding invitations. Cricut Design Space is a powerful tool, as you can design many ideas.

People who don’t have Cricut Design Space can use other alternative tools like Microsoft Word, PowerPoint, Google slides, and docs to create wedding cards.

We will use the watercolor vellum invitation to make the wedding card; the sheet of paper will cost you 10 cents. You can also make the wedding card using other editing tools by cutting the material manually with your hands.

read more...www.Cricut.com/setup Windows

Materials For Cricut Wedding Invitations

Following are the materials you will need to make a wedding card using Cricut.

  • Vellum Inkjet Paper: It is a unique transparent paper usually used for printing; you can order them online from the Amazon store. You can use traditional white cardstock to replace the Vellum Inkjet Paper.
  • Transparent PNG graphic: You can use any graphics of your choice; for the tutorial, we have used the Transparent PNG graphic.
  • Cutting machine: You can use any Cricut model you have; every Cricut machine will perform this task.

Step By Step Process For Making Wedding Invitation Card

Before moving to the making process, deciding about graphics should be done first. Transparent PNG graphics are great for making a Wedding Invitation Card. These are the bitmap images with the background removed, making overlapping and laying out text and images appear smooth.

Follow the following steps for making wedding invitations by yourself:

Upload the Transparent PNG graphics

When uploading the transparent PNG, ensure “complex” is selected, so the design details are preserved. There is no need to select or erase anything on the page because the “select and erase” function in Cricut Design Space does not work accurately. On uploading the PNG image, the background gets automatically removed.

Now save the image in your Design Space as “Save as a print Then cut Image.”

Slice the Graphics in Cricut Design Space

Once you have uploaded the graphics into the canvas, you can modulate according to your preferences, like resizing, rotating, and duplicating. In this part, you can make personal choices; there are many possibilities for what you can do. In this part, you can make personal choices; there are many possibilities for what you can do. Follow the following steps:

  • Create the rectangle shape using the square shape tool; you can resize it according to your preferences using the dimensions tool at the top panel.
  • Select print as the fill color for the rectangle and choose the color of your choice.
  • Place your rectangle onto your graphics, cut two elements at once, and delete the extra pieces outside your rectangle.          
  • Please select all the internal white pieces from the right panel and weld them again together.
  • Now rearrange all the graphics by selecting the rectangle and sending it back using the “Arrange” function in the top panel.
  • Now finally, compress all your graphics together.

Create Text For The Cricut Wedding Invitation Card

  • Use the text tool from the options to create your text overlay.
  • When you have typed all your text, ensure that everything is attached and the set fill is” print.” You can select any color of your choice for the pattern fill.
  • Finally, don’t forget to select all the text and flatten it. It’s necessary because if you do not do this, Cricut will slice all the letters in the canvas.
  • Ensure to attach your text and graphics and then flatten them.

Our Tips for Creating Cricut Invitation Cards

  • Make sure that the default bleed setting for the print and cut is on, as it helps to add extra colored patting around the cut line if the cutting is not perfectly done.
  • Don’t get messed up if you see any different lines around the area of design.
  • If you notice any of your images or text have lines around them, or the images or texts look differently as set by you, this means you made that part flatten, and that part of the fill is not set to print.
  • Different paper brands have different opacity, and each printer’s print quality is also different. The scanning mechanism sometimes has a card time on vellum print and cut tasks. We recommend using a black marker and tracing the alignment lines in this situation, which solves the problem.

Conclusion

In this blog, we have discussed step by step process of making Cricut wedding invitations. We hope this blog was helpful to you; our frequently asked questions are below.

Frequently Asked Questions

Can I make wedding invitations?

You can use Cricut for many projects; the possibilities are endless. You can make greeting cards and invitations in your Design Space with the help of the “Print and Cut” feature.

Can I use cardstock in a Cricut?

Yes, you can cut cardstock materials in Cricut; cardstock and paper are popularly used materials in Cricut cutting machines. With the cardstock, you can do many projects like paper flowers, wall decor, banners, greeting cards, and many more.

SOURCE: How To Make Cricut Wedding Invitations Cards?


You need a device to run the Cricut machine, whether a laptop or a phone, since the Cricut is operated by software named Design Space which doesn’t work on every device. This software is necessary for Cricut to perform all the functions.

In this blog, we will discuss the laptop requirements for Cricut in detail and all the technical queries one has. The major query everyone has when using Design Space is, shall I use it on my computer or phone? So let us first answer your question.

Read more...Cricut explore air 2 setup

Shall I Use a Computer or Mobile Device To Use Cricut

You will need a communication device to send commands to your Cricut machine. You can communicate with your Cricut machine via phone or computer. Now in today’s time, everyone has a mobile phone in their pocket, so it is so much accessible to everyone, and it is the most asked question, why do I need a computer when I can connect my Cricut machine via my phone?

The answer is that all the functionalities cannot be performed via your phone kerning or offset, and even you can’t use the foil tool or knife blade. If you want to use all the functionalities of your Cricut machine, you should use a Computer to connect to Cricut.

Now we have discussed why having a computer will help you work better in Cricut, the now next thing is, what computer do you need? Don’t worry; we will clear all your doubts at the end of this blog.

Laptop Requirements For Cricut: Windows

Many people make a mistake in buying a Chromebook because it is inexpensive compared to the price of a laptop or a computer. But many people don’t know that Cricut doesn’t work with Chromebooks. So, the following is the minimum requirement you need in a windows computer for using Cricut:

  • Your system must have Windows 8 or a later version with the latest updates. Note that you need a Windows 10 version (at least 64-bit) for the offset function to work.
  • You need a minimum of a dual-core or an equivalent processor to ensure your computer has enough processing speed to keep up with your workflow in Cricut Design Space.
  • A minimum of 4 GB of RAM in your Computer.
  • You need a minimum of 2GB free storage in your computer to save your project files, even though it all depends upon your work, and you may need even more if you have large projects. Opt for the cloud storage space offered in the Cricut Design Space if you don’t have the storage capacity in your computer.
  • You need either a USB port in your Computer or Bluetooth connectivity. We recommend that your computer both have a backup if there is any issue connecting with one.
  • You need a minimum of 1024 x 768 screen resolution to work on your projects.
  • A strong, uninterrupted internet connection is also mandatory for the Design Space since Design Space cannot work offline.

Laptop Requirements For Cricut: Mac

Here is the following minimum laptop requirement you should have if you’re using a Mac:

  • You need a 10.15 version of macOS to run the Cricut Design Space. You will need the latest macOS version if you want to use the offset functionality.
  • Your minimum CPU must be 1.83 gigahertz.
  • You must have 4 GB of RAM in your mac and a minimum of 2GB of free storage. If you lack enough storage space, you can opt for Cricut Design Space Cloud Storage.
  • The minimum display resolution should be 1024 x 768 pixels.
  • And last but not least, a stable internet connection as the Design Space can only work with an internet connection.

Requirements For Cricut: Mobile Device & Tablet

As you can also use the Cricut machine with your phone and tablet, here is the list of minimum requirements your device must fulfill:

  • For IOS devices, you need iOS 12 or later, and for Android, you need Android 8.0 or later versions.
  • You can check your device compatibility by going to Cricut’s official website. 

Conclusion

In this blog, we have talked about the minimum laptop requirements for Cricut. We hope we cleared your doubts and discussed minimum system requirements for Mac, Windows, and tablets/phones. If you want to know our recommended list of laptops, Windows, and Mac, read our frequently asked questions below.

Frequently Asked Questions

Which laptop do I need for Cricut projects?

Following is the list of the best laptops(mac/windows) for your Cricut use:

  • Acer Aspire 5
  • MacBook Air M1, 2020
  • Microsoft Surface Book
  • Dell XPS 15
  • Asus Zenbook Pro 14 Duo OLED 2022
  • Lenovo IdeaPad 3i
  • MacBook Pro 14 inches M1 2021.
  • Asus Vivobook S14

Which laptops are not compatible with the Cricut Design Space

Design Space is compatible with mac and windows operating systems. You can use the design space in your phone (iOS & Android) via the Design Space app. The Cricut Design Space is incompatible with the Chromebook because it runs on Chrome OS.   

What specifications should I have on my computer to use Cricut? 

The minimum computer specs you need for using the Cricut machine on your computer are as follows:

  • Windows Operating System 10 or later
  • Your PC must have a USB port to connect or a Bluetooth connection.
  • PC must have a minimum of 4 GB of RAM storage.
  • Minimum display resolution of 1024 x 768 px screen resolution. 
  • Dual Core or equivalent AMD processor.
  • Minimum 2 GB of free disk space.

Can I use Cricut on my Chromebook?

No, you can’t use Design Space software and the Cricut machine on your Chromebook because the Chrome OS used in Chromebook is not supported for Design Space. You can use phones and computers instead.

SOURCE: Laptop Requirements For Cricut


Connecting Cricut to the Computer is very easy. All you need to have is Bluetooth on your laptop and Cricut machine. Though you can also connect your Cricut using USB. In this blog, we will explain both ways.

read more...cricut setup for pc

How To Connect A Cricut To A Computer Using Bluetooth

Connecting the Cricut machine via Bluetooth is the most common way of connecting your device to the Cricut. Nowadays, every other Cricut machine comes equipped with inbuilt Bluetooth or can be connected using the Bluetooth adapter.

Follow the below steps to connect your Computer to the Cricut machine using Bluetooth:

  1. Plug your Cricut machine into the power source.
  2. Pair via Bluetooth. For pairing using Bluetooth, open Bluetooth in Settings and pair your Cricut device with your Computer by clicking on connecting.  
  3. Visit design.cricut.com/setup to download the Cricut Design Space login.
  4.  Now download and install the Design Space for your Desktop.
  5. Follow the on-screen instructions, create your Cricut ID if you’re a new user, or sign in to your Cricut account.
  6. Once your setup is done, you will be prompted with a message.   

How To Connect A Cricut To A Computer Using USB

Connecting your Cricut with your device using a USB cable may not be your first choice. Since Nobody likes wires in their workspace, and also because of the limited length of the cable. Follow the below steps to connect your Computer to the Cricut machine using USB:

  1. Turn on your Cricut machine.
  2. Connect the USB cable to your Computer and Cricut machine.
  3. Now download and install the Cricut Designer Space by going to https://design.cricut.com/.
  4. After installing the Designer Space on your Computer, create your Cricut account if you’re a new user or sign in.
  5. Finally, you can now start using the Cricut machine and start cutting.

Why Won’t Your Cricut Machine Connect To The Computer?

Sometimes your Cricut machine won’t be able to connect via your Computer because of some common issues. We will help you resolve your issue; firstly, please ensure that your Cricut machine and your Computer are near each other. The distance between both should not be more than 3-4 meters. Press the Win+X shortcut command on your keyboard if you’re using a windows computer. Then go to the settings and click on the devices options; ensure your Bluetooth is toggled. Finally, click on add Bluetooth device to pair your Computer with the Cricut device.

Conclusion

We have discussed how to connect a Cricut to a computer for both Mac and Windows. We have discussed both the methods of connecting via Bluetooth as well as via USB.

Frequently Asked Questions

How do I connect my Cricut to my Computer?

To pair your iOS/ Android device to Cricut, you must install the Cricut Design Space app and launch the application. Tap on the menu and select the machine setup. After opening the app, you must register for the Cricut ID or sign in if you’re already an existing user.

Can Cricut connect wirelessly to a computer?

Yes, both the Cricut explore air 2 setup and the Cricut Maker machines have in-built Bluetooth, and all laptops nowadays have Bluetooth connectivity. So, your Computer and your Cricut device can be paired via Bluetooth connections.

How do I reset the Bluetooth on my Cricut maker?

Follow the below steps to reset your Bluetooth on Cricut Maker:

  • Go to the settings on your android device.
  • Turn on your Bluetooth if it is off.
  • Open the start menu and click on settings.
  • Go to the Devices option.
  • Select your Cricut device and remove the device and click on confirm.

What is the Bluetooth pairing code for the Cricut machine?

The pairing code for the Cricut machine is “0000” when you’re connecting your device with the Cricut machine, you will have to use the device name from the list of Bluetooth devices. When you select the Computer you want to pair, you will be asked to type the pairing code, and then you will finally pair the Cricut machine with your Computer.

SOURCE: How To Connect A Cricut To A Computer? [Step By Step Guide]


Cricut is a modern cutting machine that electronically cuts the materials in just one click. It is the perfect machine for crafters to make awesome designs. It is compatible to make cuts on leather, card stock, paper, balsa wood, vinyl, etc. The inbuilt cutting blades make the materials into wonderful shapes and designs. The crafters must download and install the Cricut Design Space login to do amazing projects. You must reach cricut.com/setup and easily get the software.


Are you wondering how to use the Cricut Explore 2 and what it can make? This is the most asked question of all new users. This blog will solve all queries related to the Cricut machine. I expect you to scroll down and read it carefully.

Cricut is the most popular cutting machine that cuts 100+ materials in just a few minutes. We will give you information such as what you can make with this machine. You can also learn a few easy and wonderful projects for beginners as well as professionals that you can try to make yourself.

So without wasting time, let’s jump to the next section of this blog to get complete information.

Read More...Cricut explore air 2 setup

What is Cricut Explore 2?

Shortly, the Cricut Explore 2 is the latest creative machine that writes, scores, and cuts a variety of materials. You have to download and install the Cricut Design Space, which can open you to use the 3,000 ready-to-make designs. You can also create your own design with the help of this software. The pre-design projects provided have all the needed information you require while using it with your task.

This machine also has a cloud-based system, which means that you can use the Cricut Explore 2 from anywhere with your mobile, computer, laptop, or tablet. If you use the Cricut Access Standard, then you get unlimited access to over 30,000+ images and 370+ fonts.

What Do You Get Inside the Cricut Explore 2 Box?

When you buy a Cricut Explore 2 that comes with your machine, there are a few things. It is necessary to have all the items in the machine box. Below are the names of items with your Cricut machine package. Here is the items name:

  • Cricut Explore 2
  • Cricut cutting mat
  • Cutting blade
  • Accessory adapter + silver pen
  • Instruction manual
  • Vinyl + cardstock samples
  • USB + power cords
  • Cutting Scissor

What Can a Cricut Explore 2 Do?

There are various types of things that you have to make with your Cricut Explore 2 machine. In this blog section, you will learn several things that Cricut Explore 2 easily does. Here is the information:

Write

  • Coloring pages
  • Greeting cards
  • Handwritten notes
  • Stickers
  • Place cards
  • Cupcake toppers
  • Many more

Cut

  • Intricate designs
  • 100+ various types of materials and items such as card stock, fabric, vinyl, vellum, and thick leather.

Score Perfect Fold Lines For

  • Boxes
  • Water bottle hang tags
  • Cards
  • Cupcake liners
  • Place cards
  • Hundreds more

Projects You Can Make Using Cricut Explore 2

You can make amazing and various types of projects with the Cricut Explore 2 machine. You just need to have the proper knowledge to make all these designs. In this blog section, you will learn some common projects you have to make with your machine. Here is the projects name:

  • Planner stickers
  • Labels for everything
  • Baby shower invitations and decor
  • Signs
  • Mugs
  • Gift and bottle tags
  • Paper flower wreath
  • Pillows
  • Greeting cards
  • Customized notebooks
  • Baby onesies
  • T-shirts
  • Coloring pages
  • Scrapbook pages
  • And so much more

Simple Steps to Download and Install Cricut Design Space

In this portion of the blog, you will learn how to download and install the Cricut Design Space on your Windows system. If you want to use the Cricut Explore 2 machine in a positive way to get efficient results, this section is good. So let’s start learning the steps of downloading and installing the process of the Design Space. Here are the steps:

  1. First and foremost, go to the web browser and then enter design.cricut.com. Hit the enter key.
  1. And then, you have to select the Download button on your screen. Now, the screen will change and show the downloading progress.
  2. Once the downloading is completed, you need to double-click on the downloaded file on the browser download page, or you have to click on the file from the Download folder.
  1. And when it prompts you to ask the trust, click on the trust option.
  2. Now, a window will open on display, showing the application’s installation progress.
  3. Next, you have to click on the sign-in button from the open page of the Cricut Design Space.
  4. Type the Cricut username and password and hit the enter button to sign in.
  1. And then, a Cricut Design Space icon is shown on your computer display. Now, you have to right-click on the icon and then move it to the Taskbar or Pin to the Taskbar.
  2. Finally, the Design Space is ready to use with your Cricut Explore 2.

Easy Steps to Flawless Work with Your Cricut Explore 2

In this section of the blog, you will learn how to use the Cricut Explore 2 in an easy way. Read this complete section to learn how to use the Cricut machine flawlessly. All you need to do is follow each and every step which is given under this selection. Here are the important points:

  1. Initially, take your package to the location and unbox the machine.
  2. Now, peel off all the material and tapes from the machine.
  3. Follow all the steps and tutorials based on Cricut Explore 2.
  4. Also, learn how to use the Design Space for the best results.
  5. Start making easy and simple designs and then gradually jump to the more complex project.
  6. Gain complete knowledge and information, then move to another material.
  7. Always select the thing that you like the most.
  8. Keep in mind that always use the mat to create amazing designs and shapes.
  9. You can use this machine to draw and cut at the same time. It means that you can complete your task much earlier and faster.
  10. Always utilize the accessories and tools such as Easy press and bright pad that help you to do professional work.
SOURCE: How To Use The Cricut Explore 2 [Complete Beginner Tutorial]


Have you bought your latest Cricut machine and are wondering about what you do now? If yes, you are at the right place. You must keep scrolling and learning all the necessary information about the Cricut machine. This blog will teach you how to use the Cricut machine very simply.

Cricut machine is essential equipment for crafters. Without it, the crafter doesn’t make an amazing design. After buying the machine, you need to know how to install, set up, and use it. In the next section, you will learn the installation process of the Cricut machine.

So, without wasting further time, let’s navigate to its next section.

How to Install the Cricut Machine?

So, finally, you get your dream Cricut machine and want to know how to use the Cricut machine. Before learning the process of use, you need to know how to install the Cricut machine. You need to pre-decide where you have to place the Cricut machine. And after deciding on the location, you must follow the steps that we will provide you. Here are the steps:

Read More...cricut.com setup windows

  1. First and foremost, take the packed box to the location.
  1. Now, you must remove the box and all the tape from the Cricut machine.
  2. And connect all the wires and cables to the device and its ports.
  3. Press the switch button to open the machine.
  1. Go to the Cricut Design Space softer and then use the username and password to sign in.
  2. Click on the Make It option to begin the process of making the projects.
  3. Choose the Smart Set Dial.
  4. Now, place the cutting mat in the Cricut machine.
  1. Hit the button and begin the machine to start doing designs.
  2. Finally, take your mat out of the Cricut machine and check whether your project is properly designed or not.

Types Of Materials You Can Use With Cricut Machine

There are various types of materials and tools you have to be with yourself while making the projects. Here are some of the materials:

  • Iron-On Vinyl
  • Removable Vinyl
  • Butcher Paper
  • Aluminum Foil
  • Faux Leather
  • Glitter Cardstock
  • Magnetic Sheet
  • Cardstock
  • Craft Foam
  • Washi Tape
  • Chalkboard Vinyl

How to Download and Install the Cricut Design Space?

If you want to make impressive designs with your Cricut machine, then you have to download and install Design Space. Design Space has 100+ fonts, images, and a ready-to-make project that you can use to make your design very unique. If you have the Windows operating system, follow the steps below to install it. Here are the steps:

  1. First, you must go to the web browser and enter design.cricut.com. Now, click on the search button.
  1. On the opened page, click on the download button. Now, your screen will change and show the downloading progress.
  2. Once the downloading process is completed, double-click on it or go to the download folder and open it.
  1. If it asks you to trust the application, choose the option trust.
  2. Now, the screen will change, and the installation progress will be displayed.
  3. Type the Cricut username and password to sign in to the Design Space.
  1. An ion of Cricut Design Space is added to the desktop screen. You have to right-click on the icon and move it to the Taskbar or Pint to the Taskbar.
  2. Finally, Design Space is ready to use.

How To Use Cricut Machine With Design Space?

This section is the most important section of this blog. In this section, you will learn the process of using the Cricut machine to make amazing projects. Below are the steps:

  1. First and foremost, place the printable photos into the project. Now, go to the Cricut Design Space and click on the Make It button.
  2. Your photo will be added to the cut marking sensor. After that, select Continue to proceed forward to the cut interaction.
  1. Select the device from the drop-down menu. Now, choose the send option to move to the Print and Cut dialog.
  1. The image will automatically leave the whiteboards when the cut operation is completed.
  2. Now, use the printer to start printing the image; you need to locate the paper in the Cricut cutting mat and set it in the device.
  1. Finally, your design is complete through sensor marking.

Kinds of Projects You Can Make with Cricut Machine

There are various types of projects that you can make with the Cricut machine to impress your customer. Below are some of the common projects that you can make. Here are the names of the projects you can make while learning how to use the Cricut machine.

  • Party decorations and paper banners
  • Handmade greeting cards
  • Address invitations and envelopes
  • Custom painted wooden sign
  • Monograms for a cup, mug, or tumbler
  • Stencils for glass etching
  • Iron-on t-shirts and onesies
  • Leather bracelets and earrings
  • Custom stickers

SOURCE: How To Use The Cricut Machine [Step By Step Guide]
Newer Posts Older Posts Home

SUBSCRIBE & FOLLOW

POPULAR POSTS

  • How to Install Cricut Design Space: All Devices Covered!
  • How To Use The Cricut Explore 2
  • Cricut Explore Air 2 Download: A Full Guide for Mac/Windows
  • How To Make A Stencil With Cricut [A Complete Guide]
  • Which Is The Best Cricut Heat Press Machine In 2022?
  • How to Make Stickers With Cricut for Beginners? [A Quick Guide]
  • What is Cricut Joy and How Does It Work?
  • How to Slice in Cricut Design Space? [A Complete Guide]
  • How To Use The Cricut Machine [Step By Step Guide]
  • How To Use Cricut Heat Press Guide [+ Instructions]

Categories

  • connect cricut to phone 1
  • cricut 7
  • Cricut App 3
  • Cricut Blade 1
  • Cricut BrightPad 3
  • cricut com setup 32
  • cricut com setup joy 2
  • cricut com setup mac 24
  • Cricut computer setup 1
  • Cricut Design Space 64
  • cricut design space app 5
  • cricut design space download 8
  • cricut design space software 1
  • Cricut EasyPress 2 3
  • Cricut EasyPress 3 2
  • Cricut Explore 3
  • Cricut Explore 2 3
  • Cricut explore air 2 10
  • cricut explore air 2 setup 1
  • cricut explore air 2 software 1
  • Cricut Explore Air 3 1
  • Cricut Heat Press 2
  • Cricut Joy 1
  • Cricut Joy app 2
  • Cricut Joy Cyber Monday 1
  • Cricut Joy Machine 12
  • cricut joy tools 1
  • Cricut Joy Xtra 2
  • cricut login 3
  • cricut machine 33
  • cricut machine setup 9
  • Cricut Machines 4
  • Cricut Maker 5
  • cricut maker 3 36
  • cricut maker 3 setup 8
  • cricut maker setup 19
  • Cricut Mat 1
  • Cricut mats 3
  • Cricut Mini Setup 8
  • Cricut New Year card 1
  • cricut setup 39
  • cricut setup download 1
  • cricut setup for mac 14
  • cricut setup for pc 26
  • Cricut setup on computer 3
  • Cricut Shirt Ideas 1
  • cricut software app 2
  • Cricut t-shirt ideas 1
  • Cricut Transfer Tape 2
  • Cricut Window Setup 23
  • cricut won't connect to computer 1
  • cricut.com setup mac 2
  • cricut.com/create 12
  • cricut.com/register 8
  • cricut.com/setup 58
  • cricut.com/setup app 1
  • cricut.com/setup joy 4
  • cricut.com/setup windows 13
  • cricutcomsetup 1
  • design.cricut.com 7
  • design.cricut.com setup 8
  • design.cricut.com/setup 5
  • how to install Cricut Design Space 1
  • how to make shirts with cricut 1
  • setup cricut maker 3 6
  • Silhouette Cameo 4 1
  • Smartphones 1
  • www.cricut.com setup 9
  • www.cricut.com/setup 19

Search This Blog

Powered by Blogger
  • October 20241
  • July 20241
  • May 20242
  • April 20242
  • March 20241
  • February 20243
  • January 20242
  • December 20232
  • November 20231
  • April 20234
  • March 20238
  • February 20238
  • January 20235
  • December 20227
  • November 202210
  • October 20228
  • September 20228
  • August 20224
  • March 20221

Report Abuse

About Me

My photo
Richie Remington
View my complete profile

Trending Articles

  • How to Install Cricut Design Space: All Devices Covered!
  • How To Use The Cricut Explore 2
  • Cricut Explore Air 2 Download: A Full Guide for Mac/Windows
  • How To Make A Stencil With Cricut [A Complete Guide]

Popular Posts

  • Which Is The Best Cricut Heat Press Machine In 2022?
  • What's The Difference Between Cricut Maker And Cricut Maker 3?
  • How To Change Cricut Blade? [Learn Here]

Labels

  • Cricut Design Space
  • Cricut Joy Machine
  • Cricut Machines
  • Cricut Window Setup
  • cricut
  • cricut com setup
  • cricut machine
  • cricut setup
  • cricut.com/setup
  • cricut.com/setup windows
  • cricutcomsetup
  • www.cricut.com setup

Distributed By Gooyaabi | Designed by OddThemes